GRAPHICS DESIGN PROJECTS
Objectives:
203.01 Understand advanced pre‐production methods for digital graphics
203.02 Understand advanced production methods of digital graphics
203.03 Understand advanced post‐production methods of digital graphics
Essential Question:
How do we apply advanced pre‐production, production, and post‐production methods to plan and create digital media graphics projects?
Photoshop: Review
Photo Editing Review
|
For some of you, it may have been a while since you used Photoshop. For this first assignment in software, we will be reviewing Photo Editing. Please download the folder of pictures to the right, then unzip the folder in order to access the images to work with. Please make all images a SMART IMAGE before you start editing in oder to complete non-destructive editing only. For each image, you will need to assess the image and decide what edits need to be done in order to correct the image. Use the checklist to tell me what edits you made to each photo and why. The following will need to be done at least once:
Create a folder named last name + first name + period# + photoedits. As you work, save your completed images into the folder you created as a .PNG and a .PSD. Once your folder is complete, turn the folder into Scales via AirDrop. Remember to add a copy of your PNG to your portfolio folder! |
Images:
Checklist:
| ||||
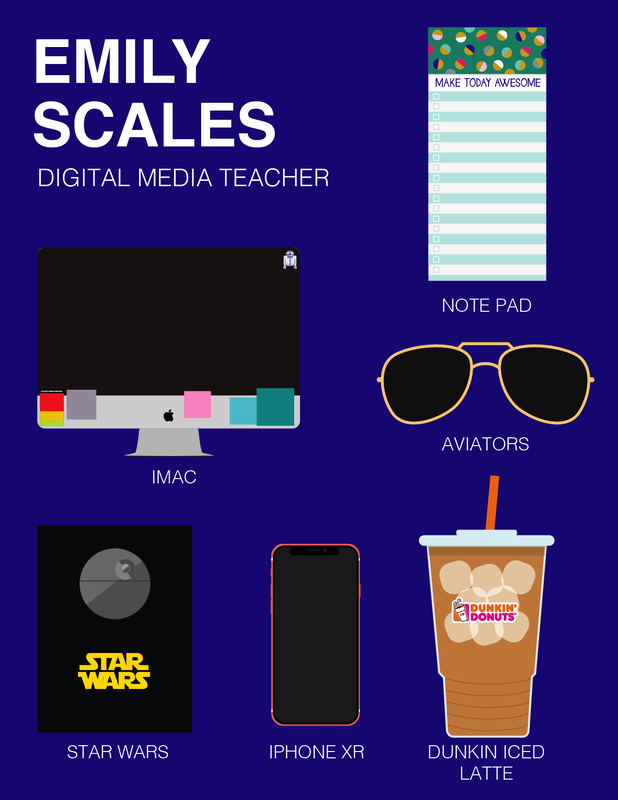
Who Are you Desktop
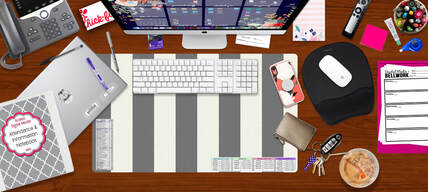
For some of you its been a while since you did any work in Photoshop, in order to refresh your memory and remind yourself of skills we will be creating an aerial view of your "desk".
You will create a aerial Desktop view of what your desk would like if you had everything out that represents who you are. All images added to your 'desk" must have the backgrounds removed cleanly. All elements must be proportioned correctly, think about the scale of items (a iPhone shouldn't be larger than a keyboard for example). I am looking for an image that not only tells me about you, but is also laid out and designed well. Be creative about what you are adding to your 'desk." YOU MUST INCLUDE 12 IMAGES MINIMUM!! When selecting images, only use High Resolution, RGB images. As you work, save your project as a .psd and name it lastname + firstname + period# + desk.psd. When you are finished, save it as a PSD and a PNG with the same name and turn in BOTH to Scales. Remember to add a copy of your PNG to your portfolio folder! Review the rubric for this project to make sure you aren't going to lose any points! |
Rubric:
| ||
It's All About the W Project
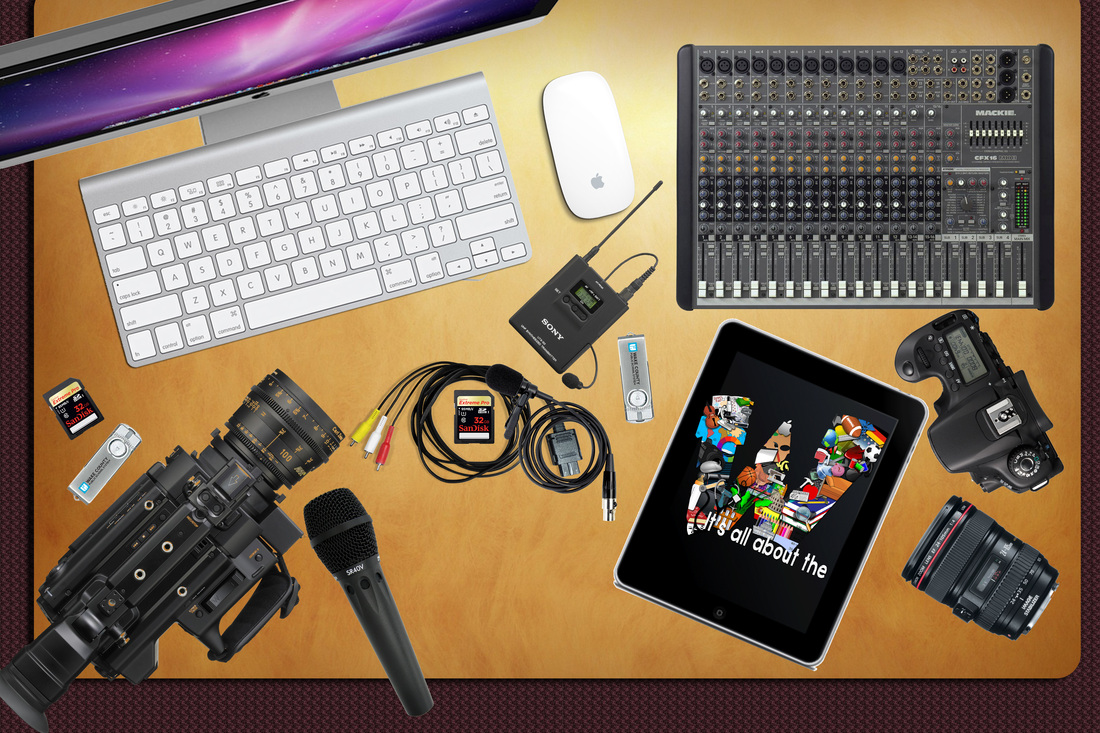
Here at Wakefield High School as you know we are all about the W! So your assignment it to create an image that represents this to you. First you will need to pick a theme that has something to do with Wakefield. BE CREATIVE! Check with Scales to make sure you haven't chosen the same topic as someone else. You will need to use the words "It's all about the" and the Wakefield W image posted here. Chose high quality images and keep your edges clean. Start by creating a 1500 pixel by 2000 pixel Photoshop canvas.
You want to ensure that the theme you have chosen comes through clearly to your audience. These will be added to scrolling images on the submerged computer in the front office. Remember to keep it simple!!! As you work, save your project as a .psd and name it lastname + firstname + Period# + TheW.psd. When you are finished, save it as a PSD and a PNG with the same name and turn in BOTH into the folder for your class. Remember to add a PNG copy to your portfolio folder! |
The W Image:
Rubric:
| ||||
ILLUSTRATOR:
Illustrator Review
|
For some of you, it may have been a while since you used Illustrator. For this first assignment in the software, we will be reviewing Drawing in Illustrator. Please download the worksheet to the right, this will open in Illustrator.
Illustrator Review 1: This will review the pen tool, brush tool and shapes tools. Make sure you are using a blank layer and haven't unlocked the worksheet layer. Also, make sure your stroke is set to at least 3 pt and a color other than black or no fill. Illustrator Review 2: This will review the Anchor point tools, the layers panel, shape builder and masking tools. Make sure you are working in the various activity layers and not the worksheet layer. Rename both worksheets as last name + first name + period# + ..... As you work, save your completed worksheets as .AI files and turn into Scales via AirDrop. |
Worksheets:
| ||||
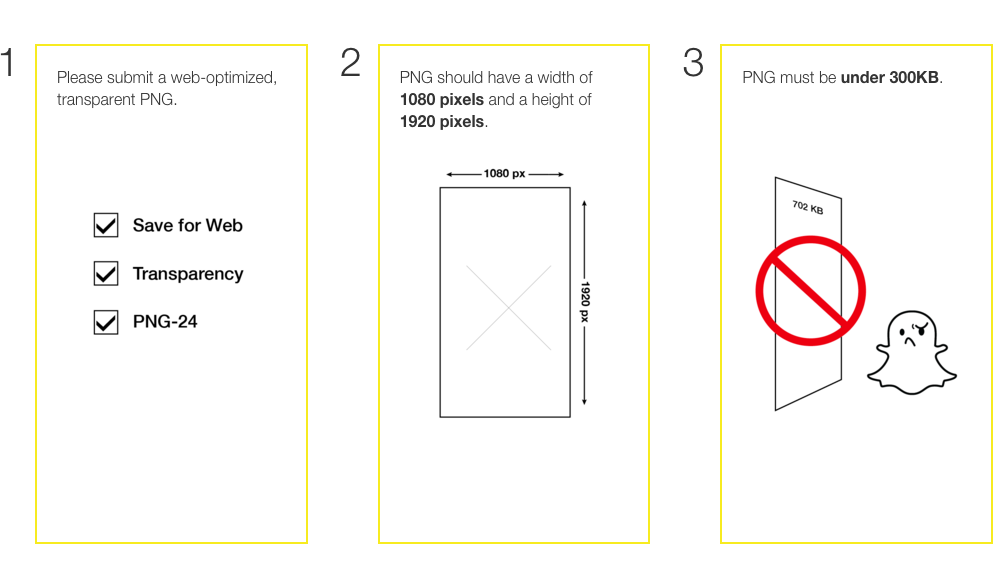
Geo Filter Project
|
You have been hired by Snap Chat to add more Geo Filters to their app for the Raleigh area. You will need to design 2 separate filters for 1 place. Be creative!! Start by downloading the Geofilter template found on the right. Please make sure that what you are designing is school appropriate imagery and/or doesn't violate someone's copyright! Before you can start your digital designs, you will need to sketch out your ideas first.
You can use pictures as a reference, but it shouldn't just be an exact copy of the original image. Use different parts of different pictures. Save as BOTH an Illustrator file (.AI) and export a copy as a .PNG file. You will turn in the .PNG to Scales. *** You will be graded on the complexity and creativity of your filter. If you finish significantly early, then your grade will suffer. As you work, save your project as a .ai and name it lastname + firstname + period # + geofilter.ai. When you are finished, save it as a PNG with the same name and submit it to Scales via Air Drop. Remember to add a PNG copy to your portfolio folder! Make sure you review the rubric for this project to make sure you aren't going to lose any points!
|
Rubric:
Worksheet:
| |||||||


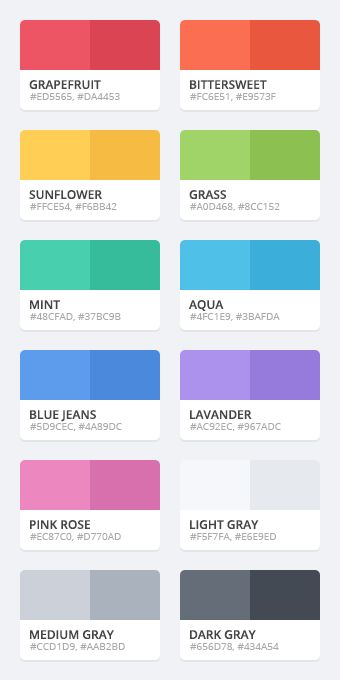
Flat Design
You will be creating a poster in flat design that represents who you are as a person. Chose things that show what you are interested in, what you do, and even how you look/dress.
You will need to chose a topic to create a design completely in flat design. You can do real world objects, a text layout, etc...It must be done in flat design colors, see the cheat sheet for help with this. You must have a minimum of 5 elements or pieces in your design, this does not include text. The size is up to you, but make it large enough so that you can work with it easily and that it doesn't pixelate when you zoom in. Flat design is all about simple colors, long shadows, and simple edges. Keep your work simple and think about the balance of your design. You must have a clear theme to the design. This should be 1500 x 2000 wide Pixels. As you work, save your project as a .ai and name it lastname + firstname + period # + Flat Design.ai. When you are finished, save it as a PNG with the same name and submit both files in a folder to Scales via Air Drop. Remember to add a PNG copy to your portfolio folder! Long Shadow Directions: 1. Make a copy of your Shape and using the Pathfinder menu, merge you item together. 2. Make a 2nd copy and place in down and to the right. Make both shapes black, and set the bottom to 0% Opacity 3. Click on the blend tool and select the 2 shadow shapes, then double click on the blend tool. 4. Choose specified steps, and set to 150. Then click OK. 5. Using the Transparency Window Menu, set opacity for the blended shape to 20% and the mode to Difference. |
Rubric:
| ||
Logo Design Project
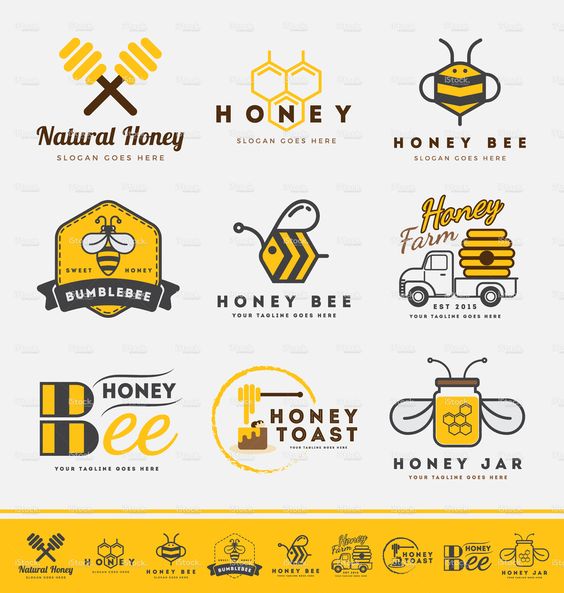
You will start with the Pre-Production stage and brainstorm logos that go with the business you have chosen to create for. The type of business you are designing for will influence the type of logos you will design. You will need to write a brief description of the company or brand you have chosen and who your target audience is, remember it must be made up brand. Then brainstorm some words you think of when you think of your brand. Next, on paper, you will sketch and/or draw a minimum of 10 mock up ideas for your business’ logo using the key words, target audience, etc... for your brand. Try to make each one different & unique so you have many different ideas to choose from. Your mock up logos will all be for the same business, not 10 different businesses. Remember these are just rough sketches or “doodles.” You will use the worksheet that Scoggins has given you to do this. You will conference with Scoggins to help decide on the 5 you will create in Illustrator. These sketches will be turned in as a part of your grade.
Next in the Production stage you will create 5 of your mock ups ideas into an actual logos using Illustrator. You need think about the description of your company to ensure that your logo works with the Business. You will create these all in 5 separate artboards in Illustrator. Be creative! Do not just do the ordinary, get outside of the box!!
After completing your initial designs, you will be put in groups of 4 to get Feedback from your classmates. You and your group members will provide positive critiques to each other on your logos. You will be graded on your feedback by your group members. You will also receive a grade based on your ability to accept and use the feedback given to you throughout the design process by your classmates and Scoggins. After acquiring your Feedback, you will begin to adjust your current designs. No one is perfect, thus you will have some new ideas from your classmates in order make some changes to improve your logos. Finally you will complete your designs for the Post-Production stage. You will turn in your final 5 logos. Your logo file need to be saved in a folder labeled Lastname+ firstname + period# + logos, inside this folder need to be your .AI files and your .PNG files. We will turn this in later once we have finished the logo packages. Remember to add a .PNG copies of all your Logos to your portfolio folder! Review the rubric for this project to make sure you aren't going to lose any points! |
Worksheet:
Rubric:
Mock up Worksheet:
Articles:Topic Sign Up | ||||||
Logo Design Package (Part 2)
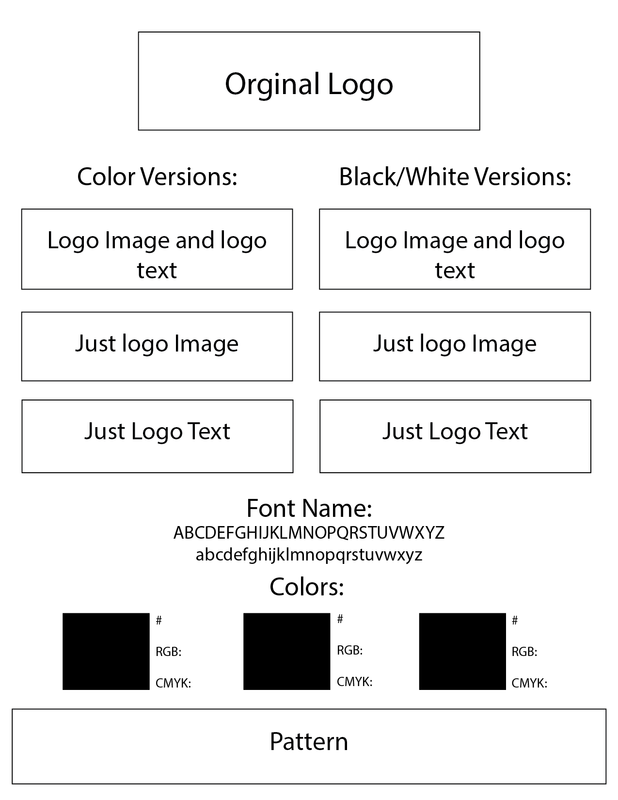
After creating your 5 logos, you will now need to pick your favorite logo to design a full graphics package for a client. When you give a client their final project, you want to give them all the files and information that they may need.
When you create your logo package, create a Letter size page (8.5x11) and use the template to guide you in getting started, but you need to make the package unique and give it a design that goes with the logo you created. In separate Illustrator file or art boards, create the items you need to finish this. Then in Illustrator, you will create your Logo Package. You will need to include the following items in your package:
Your logo package needs to be exported as PDF and added to the folder you created for your logos before. See the example of how your package should be laid out. Remember to add a .PNG copies of all your Logo Package to your portfolio folder! Review the rubric for this project to make sure you aren't going to lose any points! |
Rubric:
Package example: | ||
InDesign
Business Card Project (Part 3)
|
Now that you have a logo selected, you will need to create 2 different business cards for your client. Both designs must look very different, one will need to be PORTRAIT and one LANDSCAPE. You must include the following:
You will turn everything into a folder labeled as firstname + lastname + period# + businesscard, you will turn in a .indd file and you will need to export both business cards as .png files and put everything inside this folder need to be your .indd files and your .pdf export files. Remember to add a .PNG copies of all your business cards to your portfolio folder! Review the rubric for this project to make sure you aren't going to lose any points! |

|
EXTRAS:
Creating your Resume
|
Part of creating your portfolio will be including a Resume of what your skills and work experience include. You will need to create a resume for yourself with accurate information. I do understand that some of you will not have "real" work experience yet, but you do have classes and skill you can include. You will need to create a 1 page resume (Do not to go over 1 page). You will need to create your resume to be geared towards getting a job in the career you researched earlier. BUT, this is a graphics class so it is expected that you create something visually appealing. I have put several examples below to give you an idea.
We will be using a new software to create the layout and text, InDesign. But you may use Photoshop or Illustrator to create your images for your design. Must Include the following:
As you work, save your project as a .indd and name it lastname + firstname + period# + resume. When you are finished, save it as a PDF with the same name (ex: scogginsemily1stresume.pdf) and turn in to Scales. Remember to add a PNG copy to your portfolio folder! Review the rubric for this project to make sure you aren't going to lose any points! |
| ||
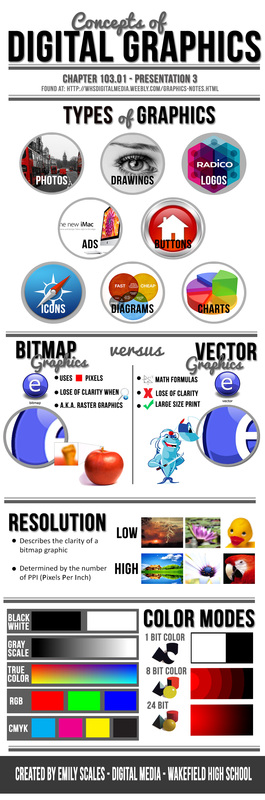
Digital Media Infographics
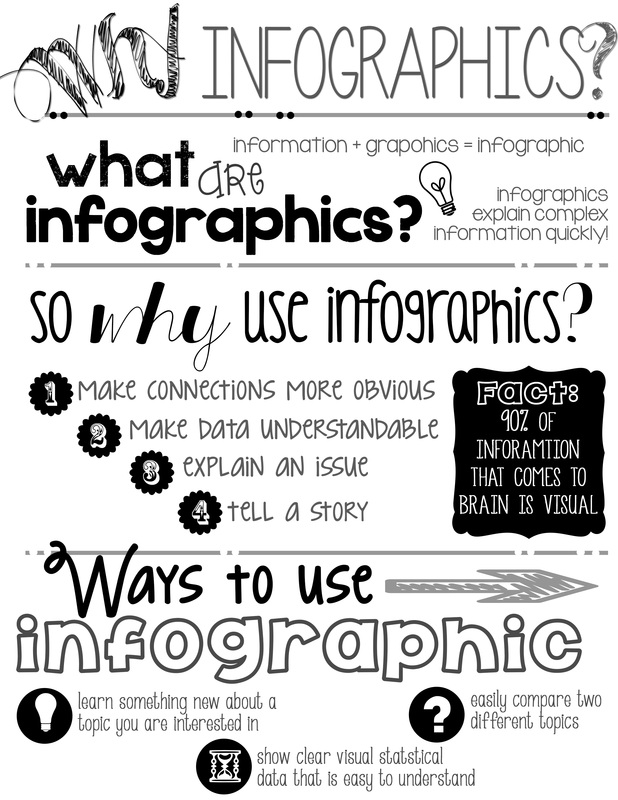
You will be creating an infographic for Digital Media 1 or Advanced Digital Media to be able to review the notes in a visual approximation. We remember 90% of what we learn visually, so infographics is the best of both worlds. Keep in mind that these will be used to help students learn and study the information in both classes. This means in addition to the infographic needing to be designed well, the information in your design must be correct!!! This includes spelling as well.
Before you start, you need to start with sketching your ideas out to give you a strong plan and something to reference as you are working. Don't stress if you make changes while you are creating, this is normal. See my examples and compare ---------------------------------------> Create a Illustrator file, starting with 1400 pixels wide by 4000 pixels high (you can increase or decrease the art board as needed). Must Include:
** Use Scales' examples to help you! All files need to be saved separately in a folder labeled lastname + firstname + period# + infographic, inside this folder need to be your .AI files, your .PNG files, and any original images you used from the the internt. Remember to add a .PNG copies of all your project to your portfolio folder! Review the rubric for this project to make sure you aren't going to lose any points! |
Scales' Sketch:
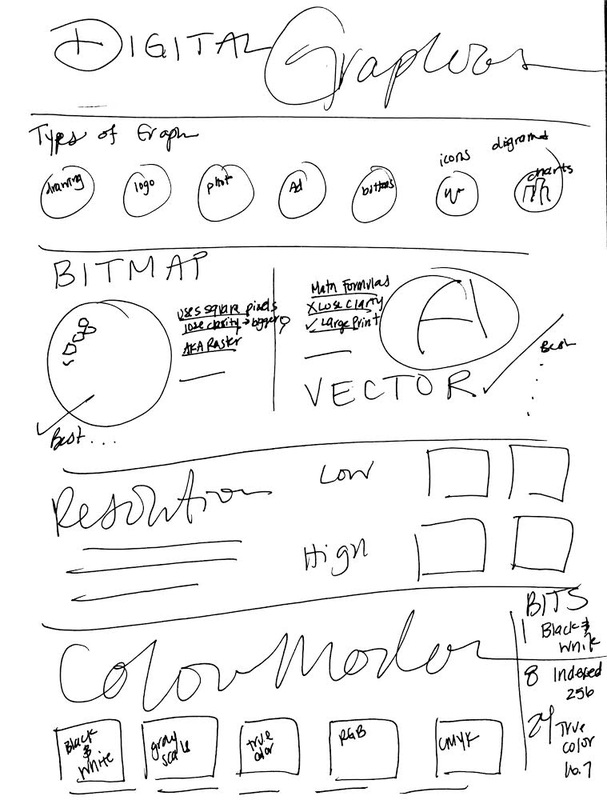
Scales' Final Product:
|
Topics:
Digital Media Safety Issues Legal Issues Graphics: Elements Graphics: Principals Graphics: Procedures Animation Basics Animation Procedures Audio Basics Audio Procedures Video Basics Video Procedures Video Camera Angles Camera Movements Web Design File Types: Graphic Animation Audio Video Web Languages Infographic Illustrator Tutorials:
|
